Delegates
Delegate access is a simple method of allowing another user to have access to certain mailbox folders and specifically to give Send on Behalf permissions. Due to Send on Behalf permissions being granted, you should be careful deciding whether to use Delegates as a mechanism of sharing folders. Typically Delegate access would be given to a P.A. or a Role Account mailbox would have permission given from it, to users who fulfil the task of handling the role account email.
How to give Mailbox Permissions
For a new School or Service (role) account you will need to log onto a University computer using the login details you have been given for the new role account, or log onto the Remote Application Service at https://ras.ncl.ac.uk.
Once you have done this open Outlook.
To give yourself or colleagues access to the Inbox you will first need to set permissions at the top level of the mailbox.
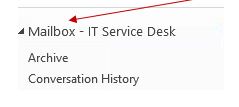
- Right click on the option for ‘Mailbox’ and select Folder Permissions.

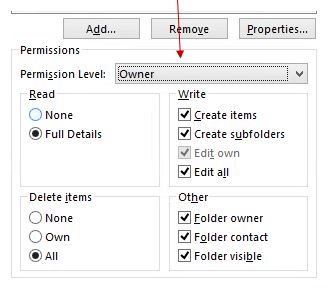
- Click Add > search for the person who needs access, select their name > click Add > OK. Ensure that the Permission Level option is set appropriately, e.g. ‘Owner’ or ‘Editor’ > Apply > OK.

The pre-defined roles include:
Editor
The Editor role allows the user to Create Items, Read Items and makes the folder visible. It also allows them to Edit and Delete all items.
Publishing Author
The Publishing Author role allows the user to Create Items, Read Items, Create subfolders and makes the folder visible. It also allows them to Edit and Delete their own items.
Author
The Author role allows the user to Create Items, Read Items and makes the folder visible. It also allows them to Edit and Delete their own items.
Nonediting Author
The Nonediting author role allows the same permissions as the author only they cannot edit any item. They can delete their own items.
Reviewer
The reviewer role only allows Read Items and Folder Visible Permissions
Contributor
The contributor role only allows the creation of new items.
- You will then need to give the person access to the Inbox, Sent Items, Deleted Items and any other appropriate sub folders by right clicking on each folder > Properties > Permissions > Add. NB: Only folders on which permissions have been set will be visible.
- Search for the person who needs access, select their name > click Add > OK
- Ensure that the Permission Level option is set to ‘Owner’ or ‘Editor’ > Apply > OK
Repeat this for each person who needs access.
Delegate Access (send on behalf of mailbox)
If you and/or your colleague need to be able to send emails ‘on behalf’ of the mailbox:
- Select File > Account Settings > Delegate Access
- Select Add > Search for the person who needs access, select their name > click Add > OK
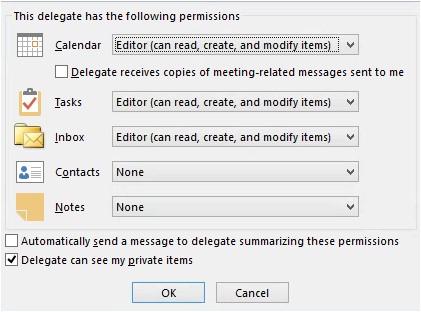
- Assign an appropriate level of access, e.g. Editor > OK > OK

How to add School or Service account into personal Outlook
Once the permissions have been set correctly each person should add the account into their own Outlook.
- Select File > Account Settings > Account Settings
Select Change

- Select More Settings > Advanced > Add
- Enter the username / display name for the required account > OK > Apply > OK > Next > Finish
NOTE: This is the only supported method for sharing role account mailboxes.
