Set-up MFA with the Authenticator app
The set-up process takes around 10 minutes and should be completed in one go, so please make sure you have time set aside.
To prevent any interruption to the set-up process we recommend you close your email and Teams.
To use the Microsoft Authenticator app, you'll need a good WiFi connection or mobile signal and enough space on your device for the app.
It's best to use a separate phone and laptop/tablet whilst following the setup process and it's a good idea to download the Microsoft Authenticator app in advance; it's free from your app store.
Once you have completed your registration please keep the Microsoft Authenticator app on your device, as you will need it when you want to access University services.
We recommend adding an additional authentication method once you have registered to use the app - please see Microsoft's guide here to do this
Set-up the Authenticator app for notifications (recommended)
Step 1
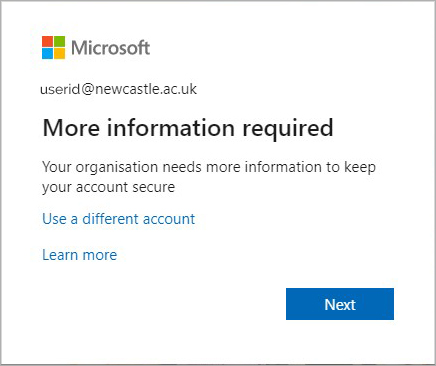
- On your PC, laptop or tablet, open a browser and go to https://aka.ms/mfasetup
- If prompted, log in with your email "Firstname.lastname@newcastle.ac.uk" or "userid@newcastle.ac.uk"
- You will be prompted to provide more information
- Select Next
Step 2
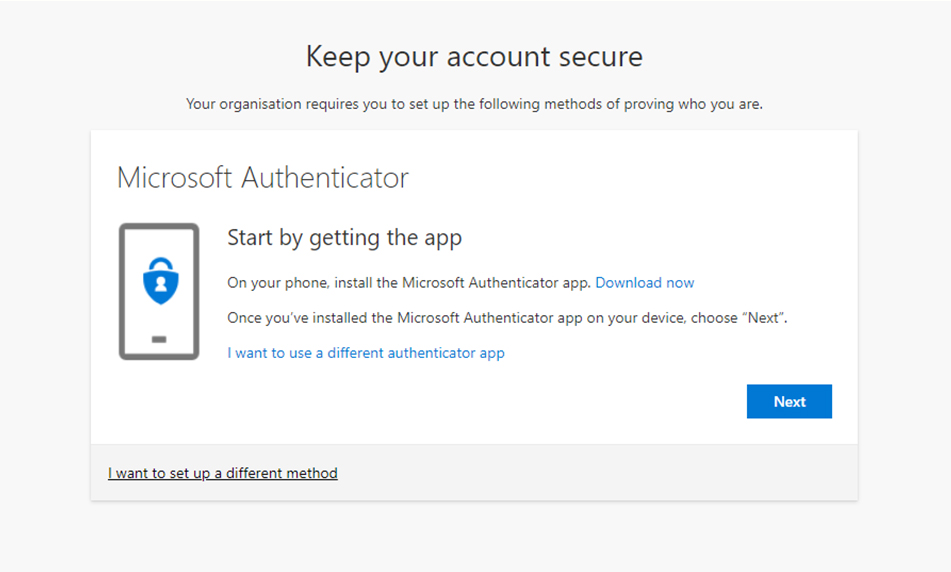
- On your phone, install the Microsoft Authenticator app. It's available from Google Play, the Apple App Store, or the Microsoft App Store.
- Once you've installed the Microsoft Authenticator app on your device, choose Next.
Step 3
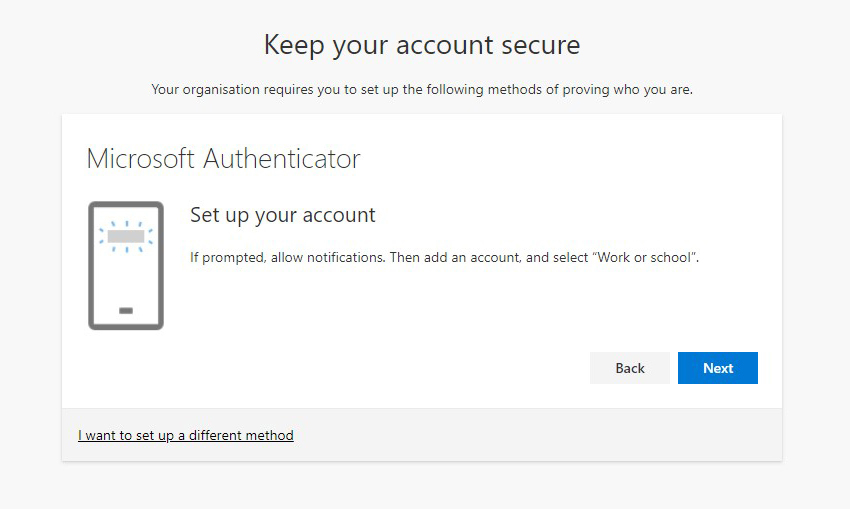
- Open the Microsoft Authenticator app on your mobile device
- Select to add a work or school account (you may need to skip the screens to "add a personal Microsoft Account" or "add a non-Microsoft account")
If you have previously installed the Microsoft Authenticator app on your device:
- Tap on Add account (+ sign)
- Select Work or School Account
Step 4
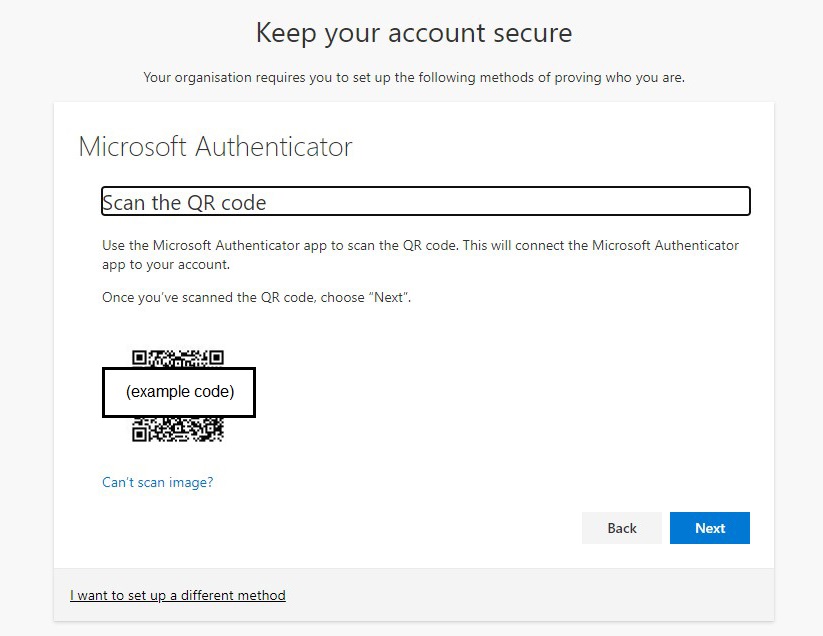
- Use the Microsoft Authenticator app to scan the QR code on your PC screen. This will connect the Microsoft Authenticator app to your account.
- Once you've scanned the QR code choose "Next". (Please note: The QR code located in the below guide is only an example and not one to be scanned)
Step 5
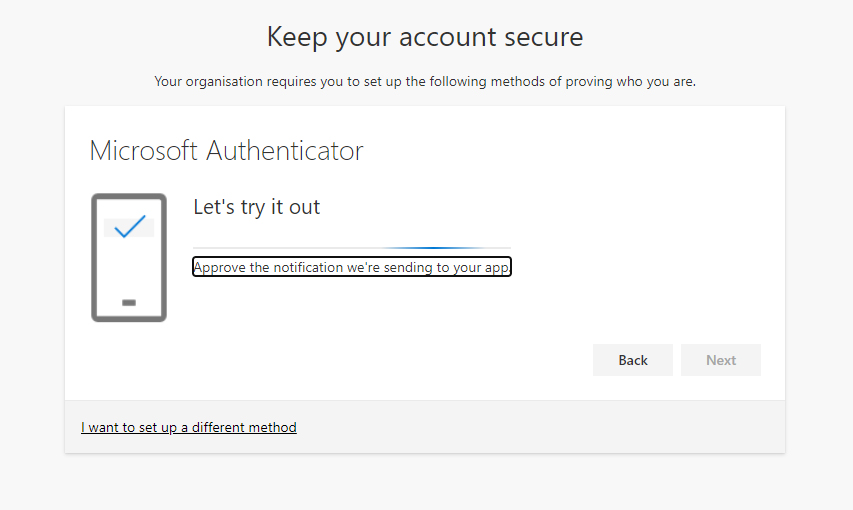
- Approve the notification sent to your app
Step 6
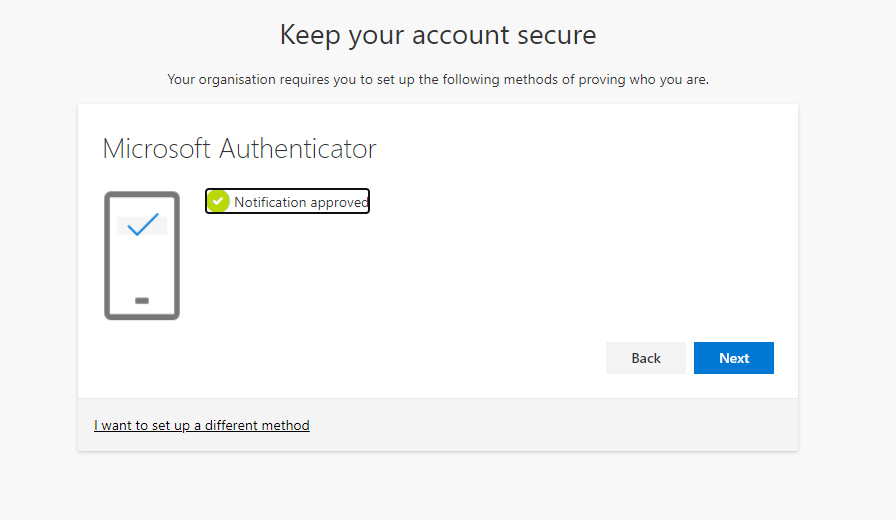
Notification Approved
- Select Next
Step 7
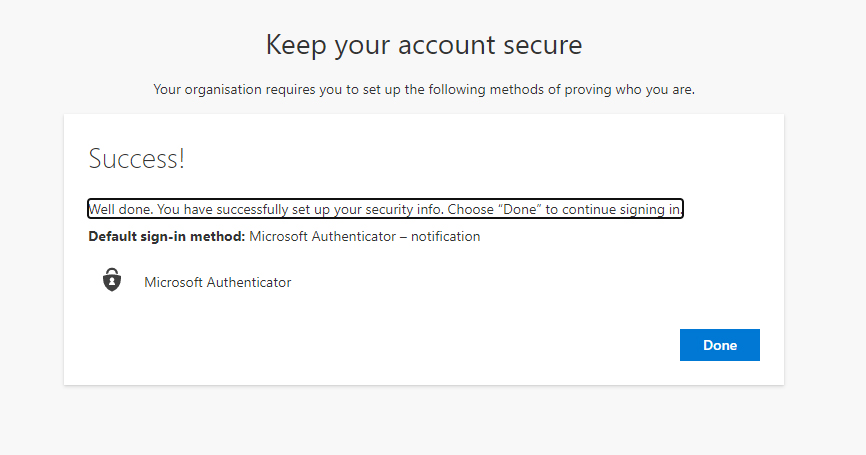
Success!
- You have successfully set up your security info
- Choose Done to continue signing in
Step 8
Security Info
- In future, you will receive a notification to approve your sign-in from the Authenticator app.

Take a look at the Microsoft video
If you cannot use the Authenticator app, please click here to view alternatives
